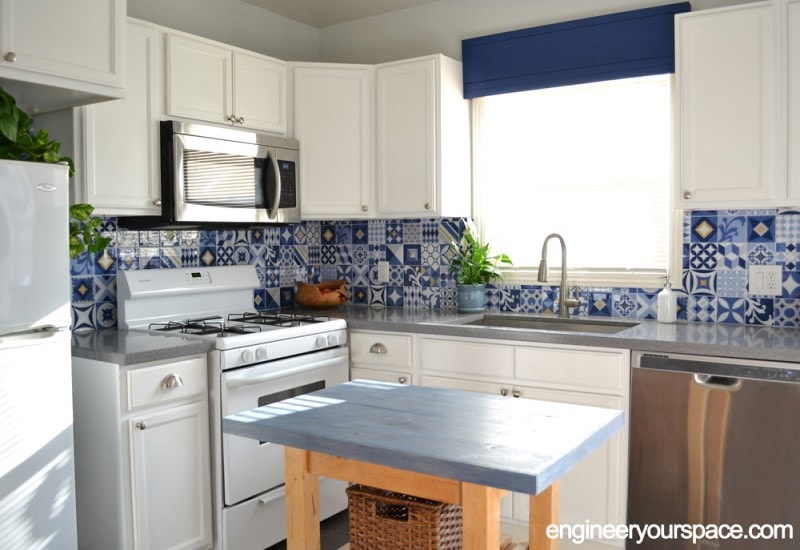
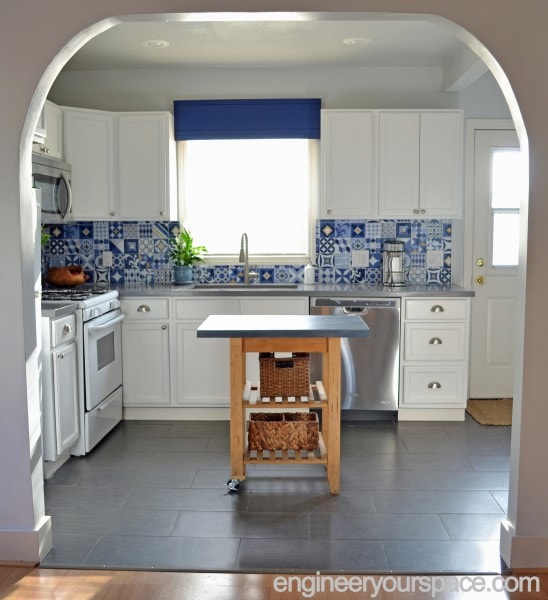
Think you’re stuck with your rental kitchen the way it is and that you can’t do anything to change it? This rental kitchen remodel will change your mind! I had a $500 budget to inject some fun and personality in a generic rental kitchen and to make it more functional to prepare meals.
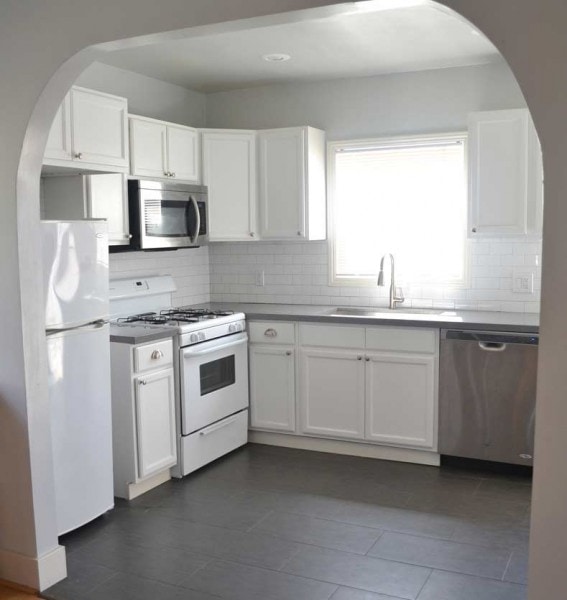
Now, first let me say that this is a perfectly nice kitchen as it is in it’s original state. It’s all a matter of taste – if you like white than this is great. If you like more color and pattern, then this isn’t going to do it for you.
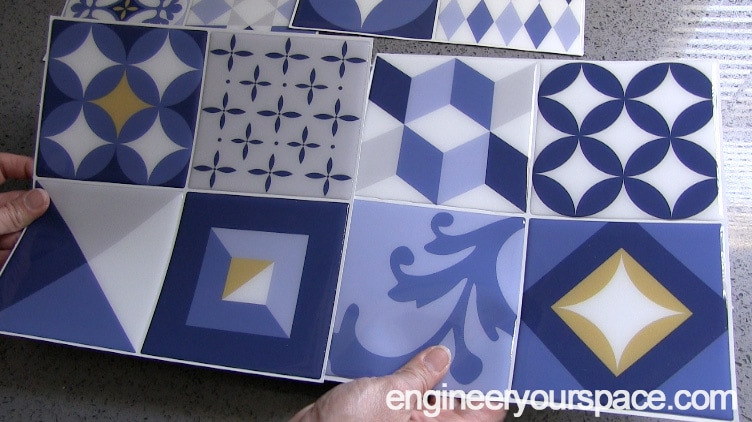
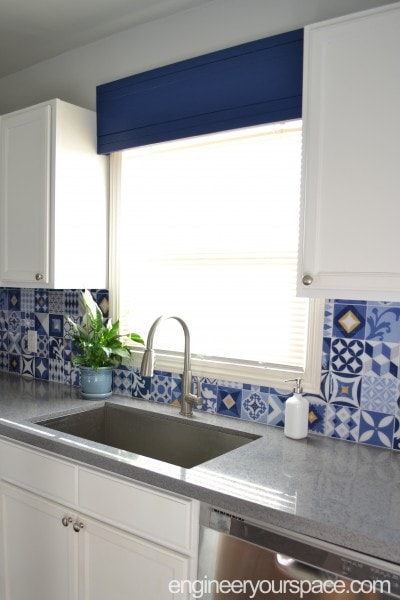
The mission was to inject some fun and personality and to do that, I chose these beautiful peel and stick tiles (Smart Tiles VINTAGE in AZUR) to “redo” the backsplash by installing them over the existing tiles. The colors and pattern in the tiles are full of life and perfectly match the eclectic quirky sense of style that I was going for.
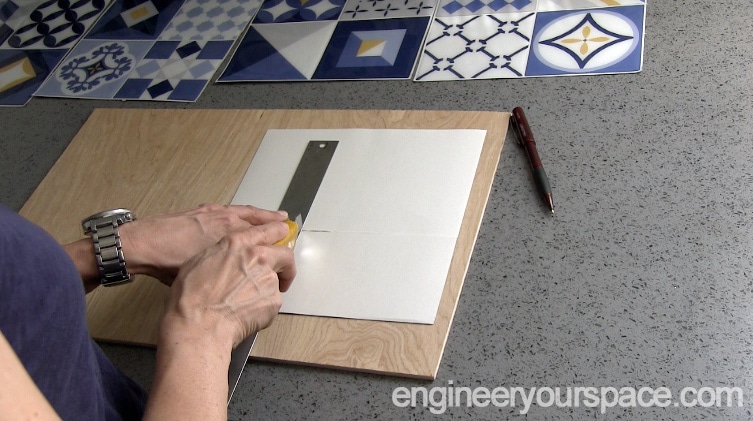
The tiles are easy to cut with a utility knife and a ruler so getting around outlets and window frames is really easy and fast.
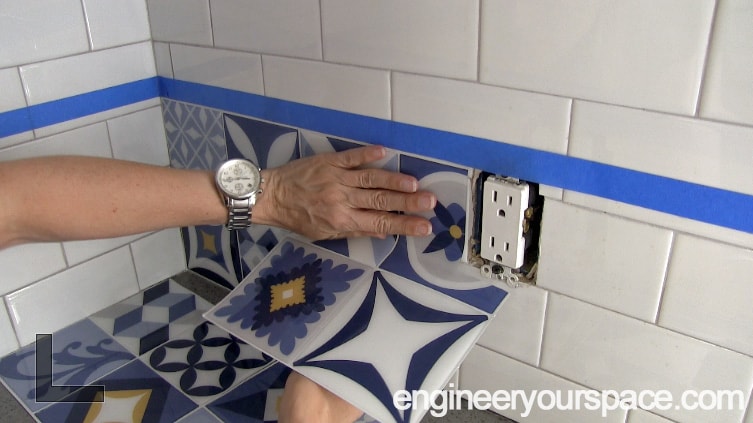
To install the tiles, you just remove the backing part way to start and then keep peeling it off as you stick the tile onto the wall, or in this case, the existing tile. Doing it this way is so much easier than having to remove the existing tile, which would make a mess! Plus it’s easy to change you mind after – All you need is a hair dryer to heat up the tiles a bit to loose up the glue and the tiles come off cleanly without leaving any residue on the existing tiles.
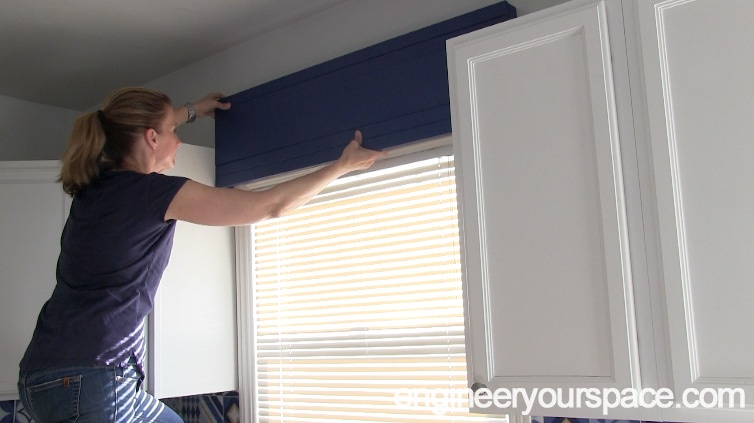
I used the colors in the Smart Tiles as inspiration for the rest of the makeover, including the rustic window cornice/valance I made with some scrap wood. By using some brackets on either side of the cornice, it simply rests on top of the cabinets so I didn’t have to make any holes in the walls to install it.
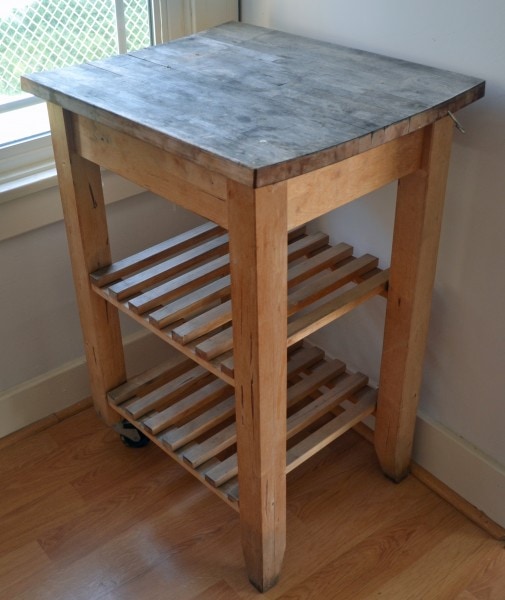
On old IKEA kitchen cart also got a revamping with new wheels and a new top. I made the top with pine boards and furring strips and stained it with a semi-transparent exterior stain from Behr in a color called wedgewood.
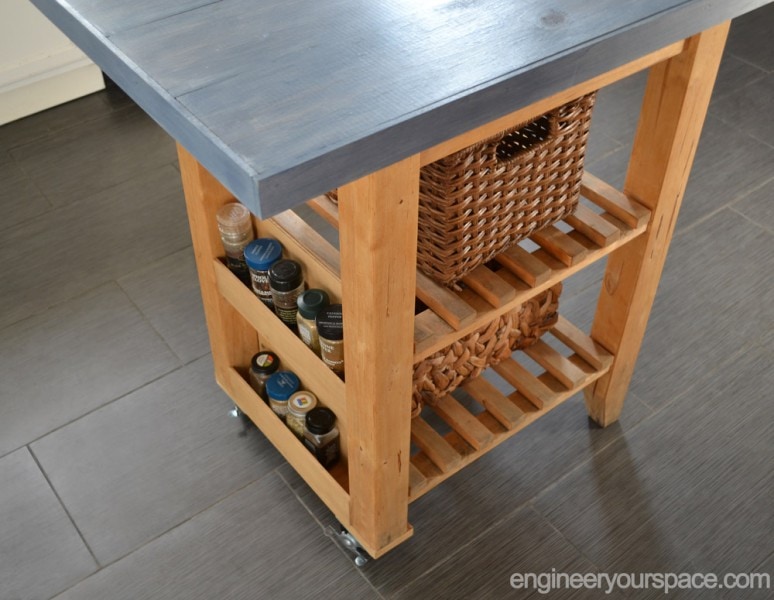
I also made the kitchen cart even more functional by incorporating a spice rack on one side. It’s now the hub of the kitchen and with the beautiful blue stain I chose for the top, it looks right at home with the tiles.
I love how this turned out and the best part is that everything is easily removable when moving out, including the tiles. All you need is a hair dryer to heat up the tiles a bit to loosen up the glue and the tiles come off cleanly without leaving any residue on the existing tiles. This is also perfect if you don’t want to commit to a look like this for the longterm.
The entire kitchen remodel came in under budget at $446, including the plants. You can watch the entire makeover, including how I installed tiles, made the window cornice and the IKEA kitchen cart revamp, in this video.
** This post was sponsored by Smart Tiles – all thoughts and opinions are my own **


nice
Looks fantastic!